Building My Own Speakers
I love music.
I’ve been listening to music almost continuously since I was a child.
Until fall of last year, I was using the built in speakers in my iMac to listen to music and before that, I was using some Audio Technica headphones. They sufficed, but were nowhere close to ideal. I knew I needed a desktop speaker system.
As any geek would, I started doing research. As I searched deeper and deeper (out of all the rabbit holes that one can fall into, the world of audiophiles is probably the deepest), I started realizing that there wasn’t just one best way to solve my problem. There are millions. I could buy a computer speaker system that works right out of the box, or I could assemble my own system from amplifiers, speakers, DACs, etc.
The only thing that was hampering me is the ratio of signal to noise in guidance and advice on the internet. With a hobby like photography, people can argue about F-tops, MTF charts and dynamic range as much as they want, but at the end of the day, most of them shut up and go out to take pictures.
With audio though, it seems that people can find much, much more time to sit at their computer and write loads of crap. The audiophile world is laden with pseudoscience and mysticism that I thought could only be found in a cult. We all know that it’s difficult to make useful and objective observations when reviewing audio systems (you just have to listen to them in person to know for yourself), but people still find the need to write endlessly about their feelings towards equipment without a shred of evidence.
When I was getting ready to give up on my search for the ideal set of speakers, I came across a small community that for some reason never came up on my radar, a true signal in a sea of noise: the DIY audio community. In this world, all the fluff and fancy words of the greater audio world are replaced with concrete terms and great advice. People in the DIY community don’t argue endlessly, but instead help each other to create their own masterpieces.
I loved it. Not only are DIY speakers cheaper than their off the shelf counterparts, they tell a story that you, the creator, write. After a bit more research, I settled on the Overnight Sensations. Click here to learn about Paul Carmody, the enthusiast that designed them. They are the most popular passive (unpowered speakers requiring an external amplifier) speaker kit. I bought it from Parts Express. Though, there are a few other vendors you can buy from.
If you want to try building these, I would suggest googling for instructions or checking out the diyaudio subreddit. In this post, I’ll walk you through a few of the steps I took when assembling my speakers with photos I took on my iPhone.
The Build Process
Look at any photo of the kit and you will see that the enclosure comes as a pile of precut wood. As you can probably guess, the first step towards turning them into speakers is gluing and clamping the panels of wood.

The wood panels don’t perfectly fit as they come from Parts Express and need a lot of sanding. This can be a time consuming process, but I made sure to take it slowly as it is very hard to undo mistakes here. If you want to save time, you could purchase an inexpensive rotary or belt sander.

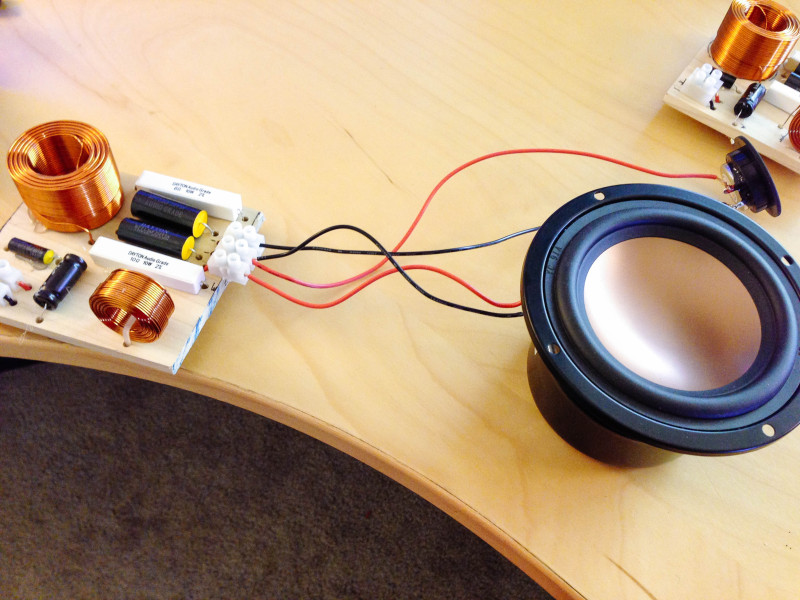
Next are the crossovers. Look at the enclosure in the picture above, and you will notice that there are holes for two drivers, one high frequency tweeter and one low frequency woofer. Yet, only two wires come into the speaker (one ground and one signal). How does each driver receive only the frequencies appropriate for it? That’s where the crossover comes in. If you took an intro EE class in college, you will recognize the resistors, capacitors and inductors in the photo below. The crossover contains two filters, one high pass filter that sends the high frequencies to the tweeters and a low pass filter that sends the low frequencies to the woofer. That’s all it is.
I used this thread and this post when deciding on the layout of my crossover. There are a few quirks that you have to design around, like the fact that the tweeter will be connected with terminals reversed and that the inductors must be placed perpendicular to each other in 3d space to prevent mutual inductance.

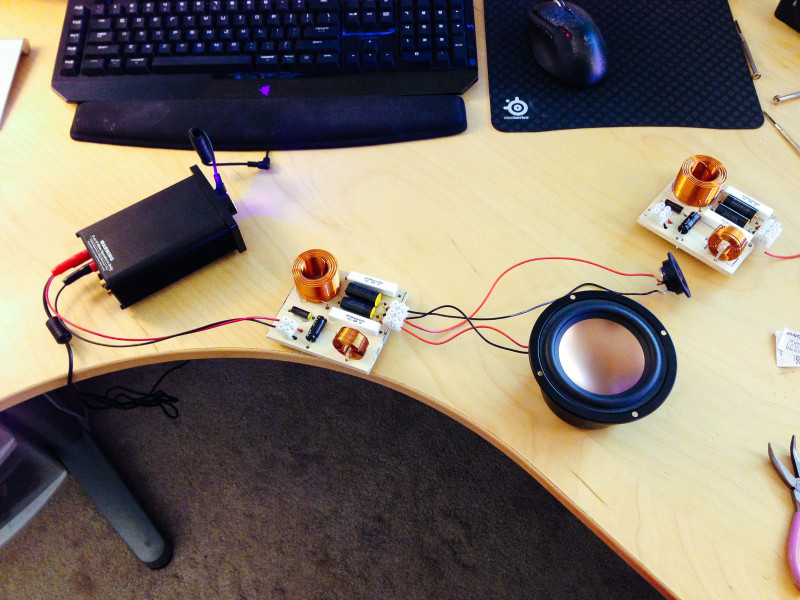
Once I built two crossovers and triple checked that all the wiring is correct, I tested each one.


Below you can see an amplifier connected to the crossover, which is connected to the two drivers. I’m not looking for great sound at this stage since the drivers aren’t installed in the enclosure yet. It’s just a sanity check to make sure that the crossovers are wired correctly and that sound comes out of the drivers.

There was some work to be done on the enclosure before I could start installing the electronics. I had to drill pilot holes for the drivers, the port tube and the binding posts. Afterwards, I applied a few coats of light stain and a few coats of satin polyurethane for protection.

In this picture, you can see that the drivers are both screwed in and wired up with the crossover. At this point, I just need to wire the crossovers with the binding posts, fill the cavities with acoustic polyfill and close up the enclosures.

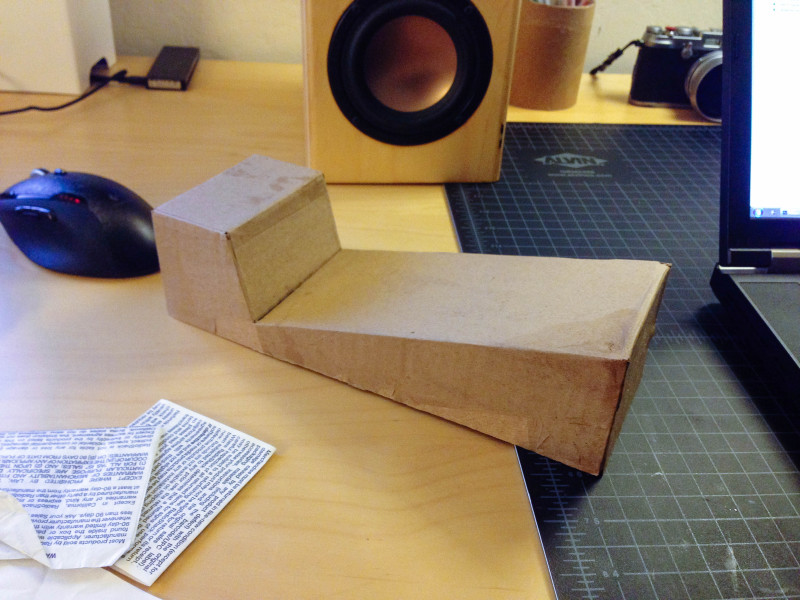
Here is how they look by my computer. I originally had them propped up on the small boxes that the tweeters came in, but that looked ugly and didn’t isolate the speakers enough from the desk surface. I constructed some speaker stands with cardboard and glue to fix that.

I eyed most of the measurements and I’m happy with the result. They look a little cheap, but they fit well with the aesthetic of the speakers.


Closing Thoughts
It’s been more than a year since I completed these and I couldn’t be happier. They sound great and they look just the way I want them to. To me, they are a constant reminder of the substantial results that a little bit of research and elbow grease can produce.
If you are in the market for new speakers and like buildings things, I can’t recommend this kit enough.